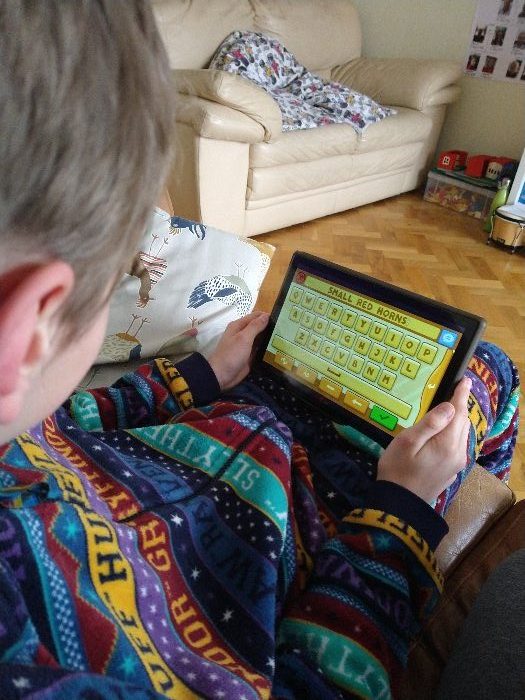
Continuing on a resource theme, the kids have been enjoying using the game app, Scribblenauts.
This is a game that involves problem solving skills. Some of the problems reference popular culture, including historical and literally references, such as Ancient Egypt or Dracula. The problems need to be read and considered, then solved by typing nouns or adjectives into a “magic notebook”.
It’s been a fun way of practising reading and spelling skills and has supported the kids’ improvement in both.
We’ve been on a quest to find a better way to explore mathematical concepts in our home education journey.
The kids engaged with Doodle Maths for a number of years. However, as the app developed, it became more school-like in its approach, which we didn’t like (plus a lot more expensive). So we decided to end the subscription.
I have been looking for a more exploratory subscription and was recommended Brilliant. It’s also a really expensive subscription, but a certain level of content been be accessed for free.
The kids have enjoyed using this resource. They like the exploratory style and clear graphics.
They have both started the logic and pre-algebra courses. I was impressed how they could reason through both of these introductory lessons, so our approach to maths must be working!
We plan to continue dipping into the free content, then we’ll see if it’s worth investing in the subscription.
As we head towards a more exploratory approach with maths, Dad and I noticed that Seb’s recent Scratch projects involved trigonometry. Dad observed that he was using a fudge to get around the maths (which worked ??), but it seemed like an opportunity to explore triangles more.
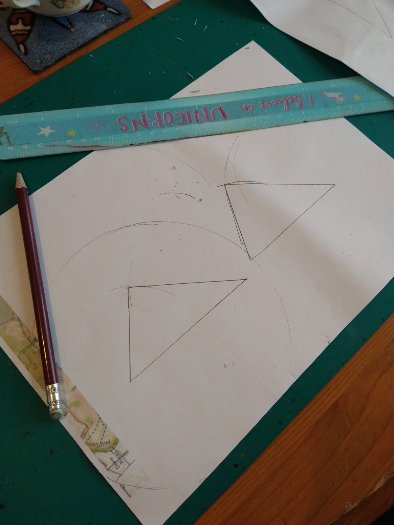
I had bought a Geometry pack a little while ago, so had a look through to see if there were any relevant activities. Triangle construction was the first activity. ?
The kids were challenged to draw a triangle with lengths 10cm, 8cm and 6cm. They had a ruler and a pencil: they soon discovered that it was really hard to draw it accurately.
I then showed them how to use a compass by setting the length and drawing arcs.
Once they had marked off the appropriate lengths, they used their ruler to draw the remaining sides of the triangle. They measured the lengths to check and they were pretty accurate.
The kids practised drawing different triangles using this method.
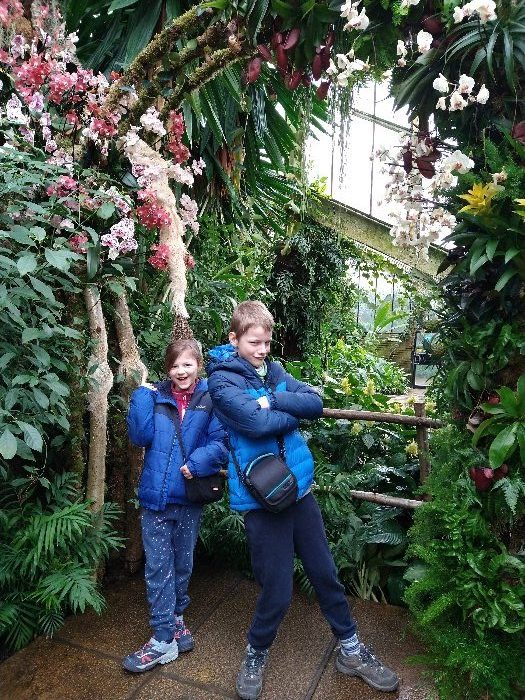
Once again using our annual pass, we visited Kew Gardens. This time, we were booked to see the orchid display at the Princess of Wales Conservatory.
It was early spring in the gardens. On our way to the conservatory, we spotted some seasonal changes: the Monkey Puzzle was producing new growth; and there were snowdrops! ??
We had to book a timeslot to visit the orchid display. It was the last day of this special event and it was very busy. ? The kids got their cameras out and starting snapping some interesting features.
At different points, the Conservatory had been transformed by stunning orchid displays!
By Seb
These displays told a story about the endangered wildlife around the globe.
Some of these animals were very well camouflaged. It took us a while to spot this crocodile!
It was lovely to see the kids focus on their photography skills to try and capture the natural objects that they saw around them.
By Maddie
Back at home, they went through the different images they had captured and selected the best ones.
By Maddie
A couple of months later, we decided to make some birthday cards using the kids’ photos. We included this one by Maddie.
By Seb
Grandad also helped Seb use some photography software to enhance some photographs – Although he added that Seb’s camera had done a good job! Hopefully with a little skill from Seb as well. ?
I loved the floral arches dotted around the conservatory.
In one section, the orchids were hanging from the ceiling in baskets, simulating their natural environment. (It was tricky to take a photo due to the light and number of people). We read this information plaque about orchids and we’re curious about their symbiotic relationship with fungi. A little while later, David Attenborough explained more about this as part of the documentary series, Private Life of Plants, that I’ve been watching with the kids.
Near the end of the orchid display were these two fantastic giraffes!
We loved their thin legs protruding out the bottom of their colourful bodies. The kids had coped really well in this over-stimulating environment. We left the conservatory in search of quieter spaces.
On our way, we came across the Kew weather station. We’d learnt about these as part of our Weather & Climate course. It was great to see a Stevenson screen in person. It also reminded us of a Death in Paradise episode that we’d watched recently and we talked about the plot of that episode. ?
As we continued walking, Seb and I commented about the branching frameworks of the trees. He recalled their fractal shape and I said that they reminded me of the capillaries in human lungs – Something to look at when we explore human biology. We looked forward to the trees springing into life soon.
We were heading back to the Marianne North Gallery, as this space had been closed last time we’d visited. On our way, we popped into the Temperate House.
Seb wanted to see the waterfall in the middle. We can’t resist touching the leaves in these places. I found one that I expected to feel smooth, but it was actually soft and hairy.
We also came across a plant that produces a really long flower spike. Once it has flowered and set seed, the plant will die. We were fortunate to see it.
Next, we reached the Marianne North Gallery: home to her vast collection of botanical paintings, recording the flora from all around the world.
We spent a while looking through the collection and identifying different plants that we recognised. The place was a marvel!
Grandma was with us and since we’d completed all the things we wanted to do for this trip, we asked her what she’d like to do next. This involved the Tree Top Walk, which we hadn’t had time to do the last time Grandma was here. It was the other side of the Temperate House, so we walked back through. ?Maddie found some differently shaped leaves: long and thin to reduce water loss through heat. There were also some pitcher plants.
It was a grey day at the top of the Tree Top Walk.
On our way round, we read more of the plaques. This one reminded us of theMystery Scienceactivity about how plants make food.
Back on the ground, we visited a clever art installation that wanted to make a point about food equity and security.
Inside, it was only possible to view one compartment at a time, due to the use of mirrors. Seb enjoyed the reflective effect.
Spring is starting to show its head around here, with carpets of spring flowers.
These will snatch the light before the tree canopies erupt. Let’s hope that the weather improves as it does.
Moving on from the mystery about the role of mould and fungi in the Web of Life, we next explored the role of worms.
We learned that understanding the interaction between earthworms and soil health is a relatively new thing. Previously, worms were thought to be pests!
In a previous mystery, we learnt that the main plant building blocks were carbon dioxide and water. But plants also need some nutrients to thrive.
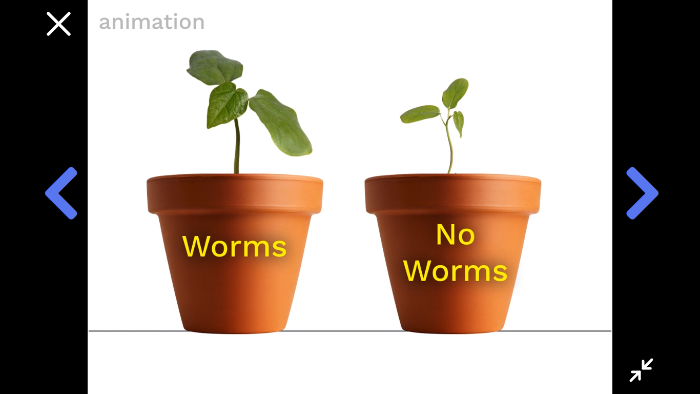
Charles Darwin became curious about the role of worms in this process and wondered how he might conduct an experiment to find out. The kids suggested having two pot plants: one with worms in and one without. Turns out that Darwin came up with essentially the same plan. ?
Cue our own exploration of worms! I had thought that it might be too cold outside currently, but a quick check in the compost bins revealed quite a few young worms that we could borrow. I scooped them up in some compost and kept them in a plastic aquarium for a short while. Inside, the kids set up their exploration area by adding some moisture to a paper towel.
They then gently added a worm and observed its movement.
The next step was to provide a darker place for the worm and see where it settled. Both worms ultimately moved under the black sugar paper.
We took a pause to write up some notes in our nature journal, since there is also a worm week in the Exploring Nature with Children curriculum.
We also gently placed a worm under the digital microscope and to help us closely observe the features of a worm before recording them in our nature journals.
The next part of the Mystery Science activity involved exploring whether worms had further preferences, in addition to liking dark conditions.
The kids set up a piece of paper towel to be wet on one side and dry on the other. Seb’s worm moved straight to the damp side, whereas Maddie’s seemed keen to generally explore! ?
After that, the kids were invited to create their own experiment: Seb provided some soil on one side of the plate and left the other side empty; Maddie added two piles of soil, but made one damp, while the other was drier.
Seb’s worm seemed to like the soil, but Maddie’s worm was confused. We concluded that it would probably work better to recreate this test several times with different worms, in order to get a more meaningful result.
The Mystery Science team created their own experiment – and they did scale it up by using 100 worms! They provided fully composted soil in one side of a tub, and compost that had a range of partially composted matter in the other side. A few days later, it was clear that worms preferred the composting materials. This was an interesting insight into the life of worms.
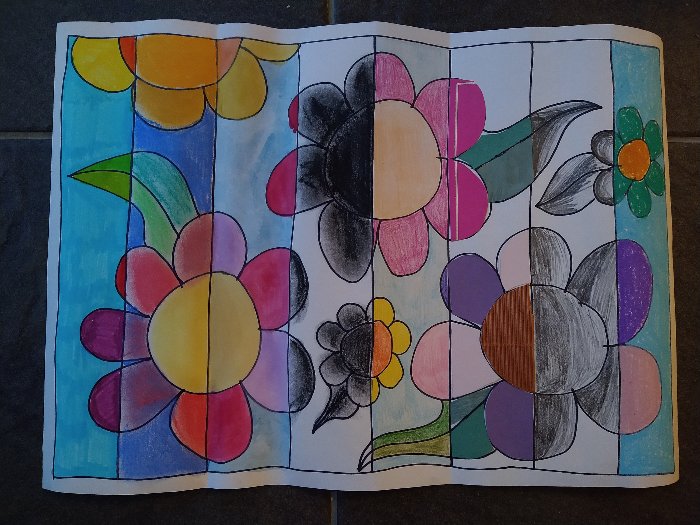
Art Group was such a popular thing to do that two of our home ed Mums wanted to keep it going. They plan to alternate the sessions that they offer and one of them will be aimed at older children.
Since we’re very nearly in the “older” category, we tried out an older session.
This was all about creating tone using charcoal and ink. It fitted in well with our learning about shading. We learnt how to use ink and different types of charcoal to create different effects.
There was a selection of natural materials, such as shells and flowers, that we could use. So the kids set to work.
Seb started with trying to capture tone using charcoal with a shell. We collected the different types of charcoal, plus a putty rubber and white chalk, and Seb experimented with them.
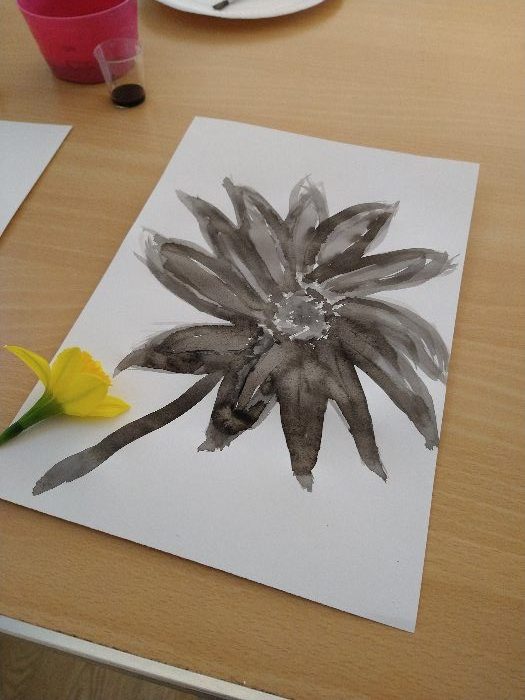
Maddie chose a carnation and experimented with representing it using ink.
She loved using the inks, so she created a daffodil with them next.
Seb was enjoying representing shells with charcoal, so he selected a new shell to draw.
He paid close attention to the tone he could see in the shell and tried to capture it.
Next, the kids tried printing with the ink. Maddie experimented with a flower – which went well until the flower disintegrated when she tried to remove it. ?
When she finished peeling all the pieces off, it looked quite effective.
Seb tried printing a leaf. He applied the ink and pushed against the leaf to make the print.
This looked effective as well. Maddie continued experimenting with making different prints. We enjoyed exploring these more advanced activities.
Continuing on our journey through the Web of Life with Mystery Science, we learnt about the role of mould in decomposition.
We also learnt that mould and fungi are the same thing! ? We thought back to the mould that we’d seen under the microscope when trying to sprout kitchen seeds and how that reminded us of fungi.
We explored how fungi used its mycelium threads to decompose items like leaves.
Today’s mystery involved a mould growing experiment.
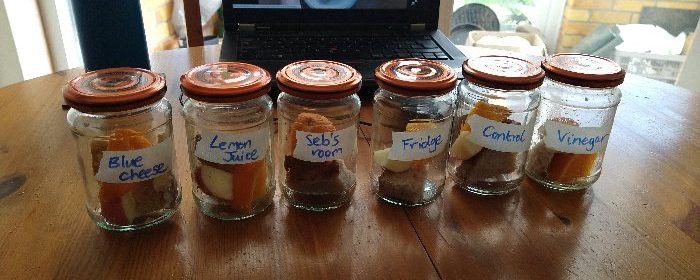
I gathered some trusty experimenting jars and we worked out what our “control” jar would like like, then planned what we would change.
We added bread, orange and apple to each jar. Each piece was dipped in water beforehand to encourage the mould to grow.
Some of our jars involved adding an extra item, such as vinegar and lemon juice. We tried to add the same amount each time.
All set up: one “control” and five different jars.
Over the next few weeks, we regularly checked the jars and recorded what mould we could see. It developed really slowly. This coincided with a cold spell, so we wondered if the cold conditions inhibited mould growth.
At the end of the time, we compared our mould record charts and considered some conclusions. We ranked the results in order, from most mouldy to least mouldy. This required some consensus on what this meant and how each jar met it. Unexpectedly, the control jar had become mouldy the most quickly. We had expected the blue cheese or being in Seb’s (generally hotter) room to speed up the process. The fridge jar definitely slowed down mould growth, with the vinegar jar coming behind it. We spoke about how humans preserved food before electric fridges were commonplace and what a revelation that invention was!
The kids have expressed an interest in improving their writing and spelling. I’ve been finding out about Copywork and thought that might be appropriate. Copywork involves copying a section of writing (often selected for its motivational qualities) and focusing on handwriting components, such as letter formation, to allow the mechanics of writing to become easier with practice.
There was a lovely Copywork pack that had been offered to home educators, so I chatted with the kids about it and bought the resource.
When we had a quiet moment at home, we sat down with the first page, which was a poem that we’d previously explored with the Nature Curriculum.
Seb and Maddie read the poem out loud, then began writing it out. The grid lines on the handwriting sheet were helpful and we chatted about the placement and height of letters.
We took our time with completing the first set of Copywork. A home ed friend explained that she’d created a book for her kids, which we thought was a good idea, so we did the same.
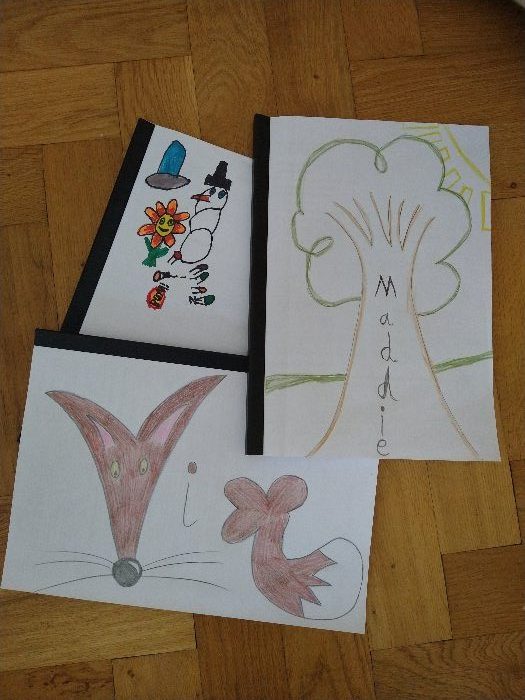
Maddie suggested adding a front cover, which we personalised. Hopefully we’ll regularly pop back to this in relaxed moments.
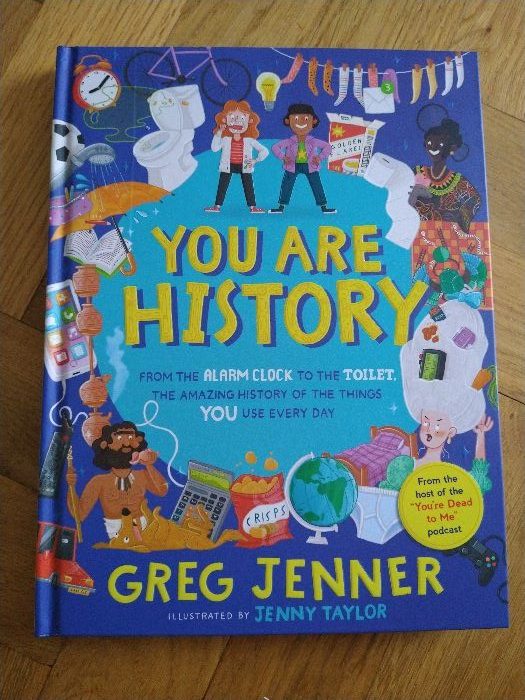
This weekend, we had the chance to meet Greg Jenner at a local theatre to listen to him tell us about his new book.
We had enjoyed listening to his podcast, Homeschool History, during the pandemic and sometimes dipped intoYou’re Dead To Me for specific topics.
Since Greg Jenner’s event was on a Saturday, Dad could come along as well. A lot of other home ed families joined us in the theatre.
Greg talked us through the first part of his book (which the kids had started reading with Dad), then took part in a Q&A session. The young people (and some adults) in the audience asked great questions.
Afterwards, we queued to meet Greg, had a brief chat with him and had the kids’ book signed. I learned that he works with History Masters students at my old university. ?